Horizontal Directional Drilling Process: 8 Steps (2026)

How horizontal directional drilling works for underground utility installs
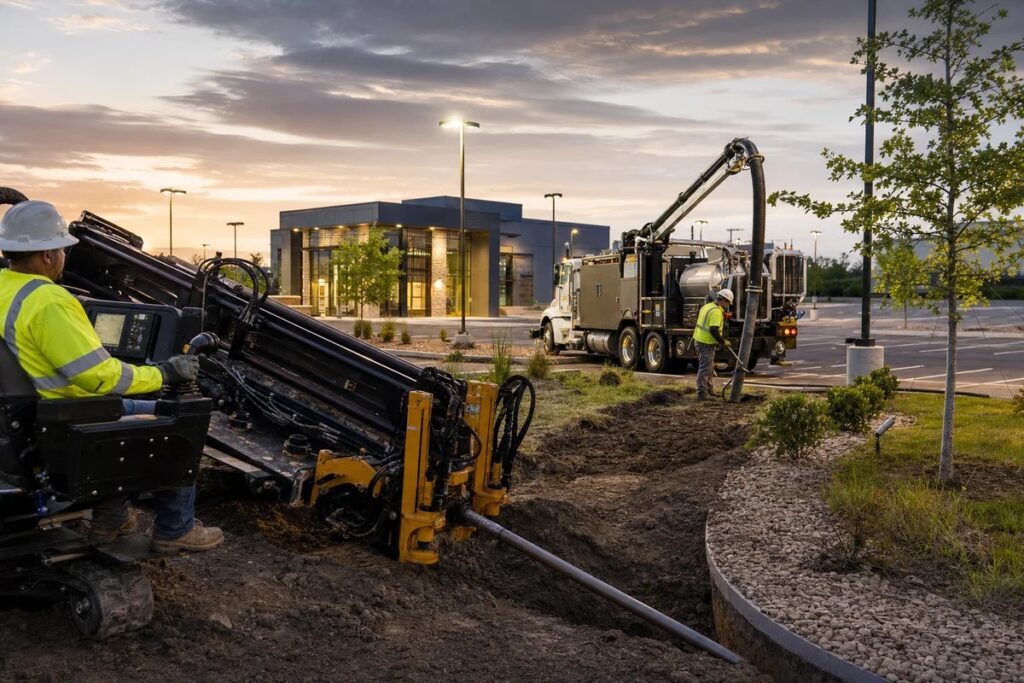
The horizontal directional drilling process is a trenchless method used to install conduit, pipe, or cable underground by drilling a guided pilot hole, enlarging it (reaming), and pulling the product back through. It reduces surface disruption compared with open-cut trenching while allowing controlled depth and alignment under obstacles.
Most owners and project managers only need to understand three big phases: utility locating and potholing, the pilot bore with steering and tracking, and reaming plus pullback. In Colorado, HDD is often a practical choice for road crossings, driveways, sidewalks, landscaped areas, congested utility corridors, and anywhere restoration costs and public impact matter.
Horizontal directional drilling steps: locate, pilot bore, ream, and pullback
If you are comparing bids or planning around site access, these horizontal directional drilling steps are the clearest way to set expectations for the full HDD process.
- Job walk and bore plan (access, entry/exit pits, traffic control, staging space, and surface protection).
- Request utility locates and review records (public locates plus prints, as-builts, and site drawings).
- Confirm critical crossings with potholing (daylight key utilities before drilling).
- Set up entry and exit points (pit layout, drilling fluid containment, and safe work zones).
- Drill the pilot bore with steering and tracking (hold line and grade, log depth, adjust at crossings).
- Pre-ream and final ream to the target diameter (often in controlled passes).
- Stage product and complete pullback (conduit, pipe, or a duct bundle, using proper hardware and handling).
- Verify, test, document, and restore surfaces (as-builts/notes, test results as required, and clean restoration).
The sequence stays similar from job to job, but details change based on soil conditions (Front Range clays, cobbles, and mixed fill are common), depth requirements, product type (conduit vs. pipe vs. cable), and right-of-way constraints like tight setbacks, traffic, or limited staging space.
Utility locating in the HDD drilling process: plan the bore with confidence
Utility locating is not a formality in the HDD drilling process; it is the risk-control step that protects people, property, schedules, and budgets. A locate ticket and paint marks are a starting point, and responsible contractors often plan verification in higher-risk areas. In Colorado, older records, private utilities on commercial sites, and tight corridors in established neighborhoods make planning even more important.
Directional boring process prep with Colorado 811 and records research
A practical workflow for directional boring process prep usually looks like this: request a Colorado 811 locate, confirm ticket scope and timelines, walk the route, photograph markings, and flag conflicts or gaps before equipment shows up. On commercial properties, plan for private utility locating as well, things like parking lot lighting, irrigation, private power, access control, and data lines that may not be covered by public locates.
Before drilling, document the proposed bore path, offsets from markings, depth targets, and known crossings. Many damage-prevention best practices (including guidance commonly referenced by the Common Ground Alliance) emphasize documentation and verification planning as key ways to reduce utility damage risk.
Potholing with hydro excavation to confirm depth and crossings
Potholing (also called daylighting) is the non-destructive exposure of utilities at key crossings so crews can confirm location and depth before the pilot bore. This is where hydro excavation (sometimes called hydro trenching) shines; it uses pressurized water and vacuum to excavate precisely with less risk of damaging the line.
Potholing typically happens near crossings, tie-in points, and congested corridors where tolerances are tight. The payoff is straightforward: fewer surprises, better confidence in the bore plan, and a reduced risk of utility strikes.
Pilot bore: the horizontal directional drilling procedure for line and grade
The goal of the pilot bore in the horizontal directional drilling procedure is to create an accurate, steerable pathway that hits entry and exit points while maintaining safe separation from existing utilities. Crews control the pilot using drill head steering, tracking/locating, and continuous adjustments to stay on plan. Good pilot accuracy sets up everything downstream: fewer ream passes, smoother pullback, and reduced risk of surface heave.
Steering, tracking, and avoiding utilities during the pilot bore
Tracking is how the crew knows where the drill head is in real time: locating the transmitter, verifying depth, and logging key data so the bore stays within the planned path. Utility avoidance is built into this step, maintaining separation, adjusting pitch and direction at crossings, and using pothole confirmations as checkpoints when the corridor is tight.
Quality control cues include consistent progress, stable drilling fluid returns, and documented bore logs that help owners and GCs feel confident about what is actually in the ground.
Drilling fluid and spoils management for clean, stable bores
Drilling fluid supports the bore, carries cuttings to the pits, reduces friction, and helps stabilize the hole during drilling and reaming. The crew monitors returns at entry and exit, adjusts viscosity as needed, and keeps housekeeping tight so the site stays safe and professional.
For clients, the main expectation is containment and cleanup: fluids are managed at the pits, spoils are staged for removal or disposal per project requirements, and restoration focuses on leaving the area neat and functional.
Reaming and pullback in the HDD installation process
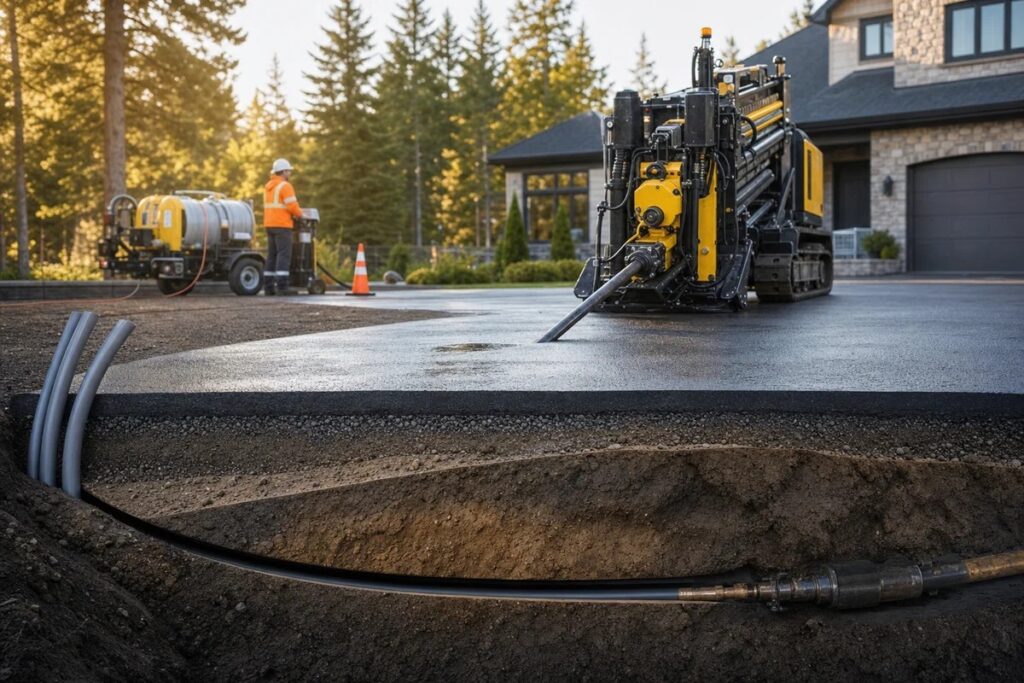
Reaming exists because the pilot hole is too small for the product; the bore is enlarged in controlled stages to the final diameter. Pullback is the HDD installation process step where the conduit, pipe, or duct bundle is attached and pulled back through the reamed hole while monitoring tension and alignment. This phase can slow down with cobbles, variable soils, tight radii, insufficient staging space, or product handling constraints.
Upsizing with reamers and monitoring torque and returns
Crews choose a reaming strategy based on target diameter, product type, soil conditions, and whether the job needs one pass or multiple upsizes. During reaming, they watch torque loads, pull forces, and consistent returns to reduce the chance of stuck tooling or inadvertent returns at the surface.
From a practical standpoint, careful reaming reduces stress during pullback and helps protect the product and its connections during installation.
Pullback for conduit, pipe, and fiber optic cable placement
Pullback starts with staging: laying out product in a clean line, protecting bends, and setting the right swivels and connection hardware to prevent twist and over-tension. Common installs include electrical conduit, communications duct, and (where applicable to the project) water or gas pipe, plus fiber conduit that may be used later for cable placement.
Good coordination keeps the pullback smooth, maintains alignment at the exit, and protects nearby surfaces and landscaping. When the scope includes communications work, the next steps may also include cable placement services, fiber splicing, and fiber testing to commission the system.
Directional boring process vs. open trenching (quick comparison)
People often ask whether HDD is always “better” than trenching. It depends on surface impacts, risk around existing utilities, and restoration requirements, especially for finished areas like asphalt, concrete, and landscaping. If you want a deeper breakdown, see this directional drilling vs. trenching comparison.
| Factor | Directional boring (HDD) | Open trenching |
|---|---|---|
| Surface disruption | Minimal (entry and exit points) | Continuous excavation along the route |
| Best use cases | Roads, driveways, sidewalks, landscaped areas, crossings | Shallow, unobstructed runs with easy restoration |
| Restoration scope | Smaller footprint, targeted repair | Typically larger pavement, concrete, or landscape replacement |
| Working near existing utilities | Often safer with verification (potholing) and tracking | Direct exposure can be straightforward but higher disruption |
Wrap-up work: testing, as-builts, and surface restoration after HDD
After pullback, crews verify the installation, document the bore, and restore disturbed areas at entry and exit points. Clients should receive clear notes or bore logs (as applicable), test results when required by spec, and communication on what is complete versus what comes next (like cable placement, terminations, or electrical tie-ins). Professional wrap-up also means clean sites, safe backfill practices, and restoration that respects parking lots, driveways, lawns, and sidewalks.
What gets tested: mandrel, pressure, and fiber testing documentation
For conduit, mandrel testing and continuity checks may be specified to confirm the pathway is clear and properly installed. For pipe, pressure testing depends on the utility type and project specifications. If the project includes fiber work, expect fiber testing documentation (such as OTDR and power meter results), which supports fiber splicing and commissioning requirements.
Horizontal directional drilling process FAQs and next steps in Aurora, CO
If you are planning work in Aurora, Denver, or nearby Front Range communities, these are the questions that usually come up first when budgeting and scheduling an HDD install.
How long does the HDD process take for a typical utility install?
Timeline depends on bore length, depth, soil conditions, utility congestion, and required potholing. Many straightforward bores can be completed in a day, but complex corridors often need more time for verification, ream passes, staging, and restoration.
What is the difference between the directional boring process and open trenching?
The directional boring process installs utilities with minimal surface disruption by drilling and pulling product underground, while open trenching excavates the full path. HDD is often preferred for crossings and finished surfaces, while trenching can be efficient for shallow, unobstructed runs with easy restoration.
How deep and how accurate is the HDD drilling process?
Depth and accuracy depend on rig size, locating method, soil conditions, and site constraints. A properly tracked pilot bore helps crews maintain planned depth and alignment, with potholing used to confirm critical crossings and reduce risk around existing utilities.
What happens if you encounter an unknown utility during the horizontal directional drilling procedure?
Work is paused to reassess the bore path and confirm the utility by safe exposure methods such as hydro excavation. The plan may be adjusted to maintain separation, protect the line, and stay compliant with site requirements and safety practices.
Who provides the HDD installation process in Aurora and Denver, and what should I ask for in a bid?
Look for a Colorado HDD contractor that is licensed and insured, with a strong safety culture and the right equipment for your bore length and product type. Ask how utility locating and potholing will be handled, what documentation you will receive, and what restoration is included; a site walk helps pricing reflect real access, soil, and crossing conditions.
Ready to plan a bore that protects your surfaces and your schedule?
If you are installing underground utilities in Aurora, Denver, or nearby Front Range communities, it helps to start with a walk-through and a realistic bore plan. UES Construction is licensed and insured, and we offer free estimates and a free consultation.
If you want help scoping the right approach for your site (HDD, hydro excavation for potholing, or restoration needs like asphalt, concrete, and grading), request a free consultation here: https://uesconstruction.com/contact-us/.

